


9 steps to calculate the frame rate of your machine vision camera using the frame rate calculator
The frame rate calculator is a valuable tool for determining the optimal frame rate of industrial cameras. In this guide, we will provide detailed instructions on how to use the frame rate calculator, focusing on the USB3 camera model MARS-1230-23U3X. Additionally, we will highlight key distinctions between USB3 and Gigabit Ethernet cameras, using the MER-131-75GX camera as an example. You can locate the frame rate calculator in our download area.
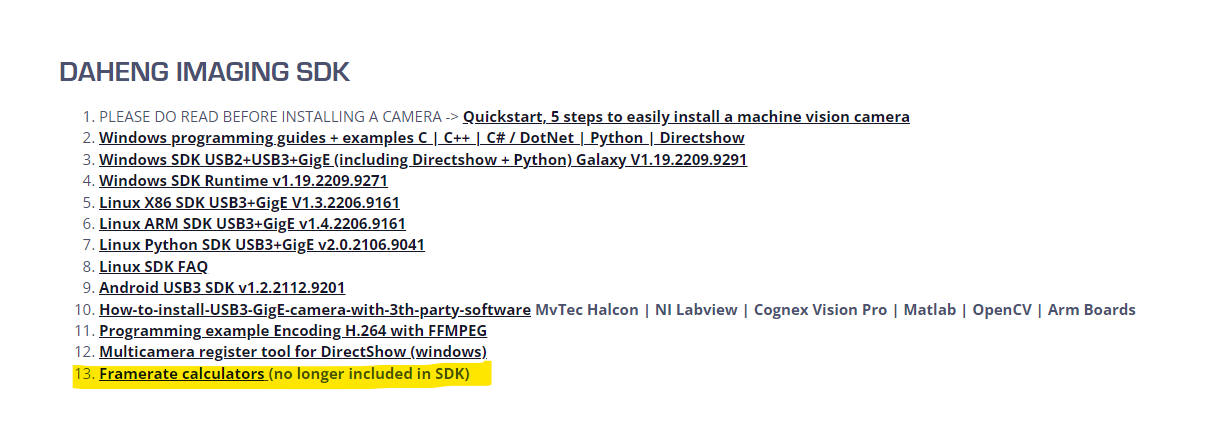
Step 1: Open the correct frame rate calculator
To begin, open the appropriate frame rate calculator designed for your camera series. Each camera series has its own dedicated calculator.
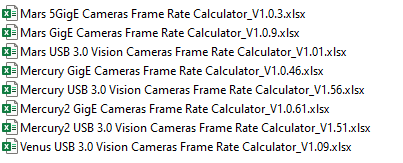
In this case, we will utilize the MARS USB3 camera frame rate calculator. Please note that certain parameters, such as binning or decimation, may vary depending on the camera type.
Step 2: Fill in the exposure time
Start by adjusting the “exposure time (us)” setting in the frame rate calculator. This parameter determines the duration for which the camera’s sensor captures light. By reducing the exposure time, you can avoid it becoming a limiting factor for the FPS outcome. The minimum value for exposure time is determined by the specific setup and environmental conditions. However, to achieve the maximum possible frame rate, set the exposure time to 64. This ensures that exposure time will never hinder the frame rate calculation.
Step 3: Determine the ROI (Region of Interest ; width / height)
The width and height settings define the size of the sensor in pixels that will be used. It is possible to select a Region of Interest (ROI) smaller than the available size in the frame rate calculator. This results in a smaller image and reduced data. This reduction in data facilitates higher FPS. Refer to our guide on how to set a Region of Interest (R.O.I.) inside an industrial camera in 3 steps.
Please note that decreasing the picture size may not always increase the FPS. For instance, with the MARS-1230 camera, reducing the width does not impact FPS, but reducing the height does. This behavior is common for many Sony IMX sensors. Conversely, OnSemi Python sensors exhibit increased frame rate when reducing the width or height.
Step 4: Option for using binning
Certain camera series support binning, which enhances light sensitivity. If binning is available, you will find the corresponding parameter in the frame rate calculator. Binning involves combining data from multiple pixels, resulting in a significant reduction in image size. For example, with 4-pixel binning in both width and height, 16 pixels are combined into a single value. This reduces the data transmitted by a factor of 16. Adjusting the binning setting to achieve the desired image size is crucial for accurate FPS calculation.
Due to the warning message, make sure to correct the width and height settings to obtain the correct FPS output. It is important to note that despite binning, the camera still reads all pixels on the sensor, limiting any potential increase in FPS.

Due to the warning message, we first have to correct the Width and Height so see the correct FPS output.
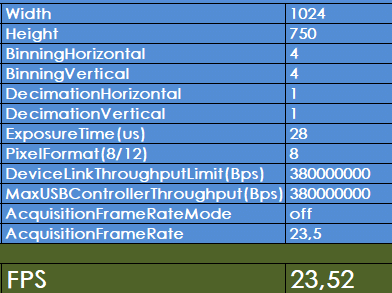
Because the machine vision camera still needs to read all pixels on the sensor, we do not have an increase in FPS.
Step 5: Option for using decimation (horizontal / vertical)
Decimation operates similarly to binning, where data from all pixels is collected, but values of nearby pixels are discarded. By reducing the image size through decimation, you can obtain a picture with the same dimensions as the original while collecting less data. This leads to reduced processing power requirements and lower data transmission. Unlike ROI, decimation does not impact the visible area size. Depending on the camera model, decimation can contribute to an increase in FPS.
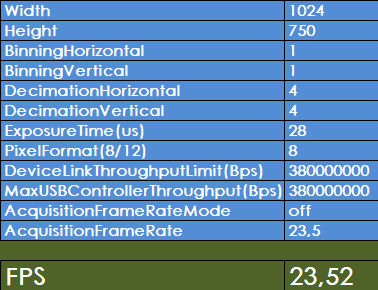
For instance, 4096x3000 pixels with decimation set to 4 will result on an image of 1024*750 (the software warns us to change this parameter to calculate the correct FPS output).
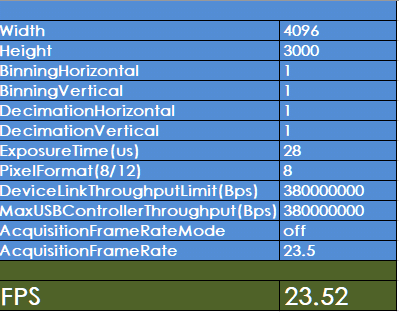
Step 6: Pixelformat (8-bit to 12-bit)
The Pixelformat setting determines the color or gray levels per channel, with 8-bit providing 256 levels, 10-bit offering up to 1,024 levels, and 12-bit providing 4,096 levels. These additional gray levels are valuable for image processing. However, since most displays are limited to 8-bit, the difference may not be visible due to screen limitations.

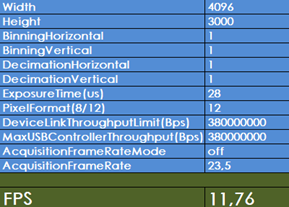
To enhance image details and collect more data at the expense of FPS, consider adjusting the Pixelformat value from the standard 8 to 12.
Step 7: Devicelinkthroughputlimit(bps)
Devicelinkthroughputlimit determines the available bandwidth for the camera. In multi-camera setups, it is crucial to allocate a fixed bandwidth for each camera to prevent interference.
The total usable bandwidth is 380,000,000 Bps. For example, if you have two cameras on a USB3 bus, each camera will have a bandwidth of 190,000,000 Bps. Learn more about effectively controlling bandwidth with multiple cameras.
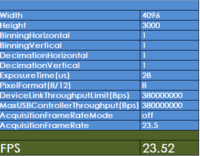
Step 8: Additional options in the frame rate calculator
The frame rate calculator offers additional options, including:
- MaxUSBControllerThroughput (Bps): This setting determines the maximum bandwidth available from the USB controller. The standard value is 380,000,000 Bps, and it is generally not necessary to modify this value.
- AcquisitionFrameRateMode: Enable or disable this mode to set a fixed frame rate lower than the camera's maximum achievable frame rate.
- AcquisitionFrameRate: Manually specify a constant FPS value to ensure the camera captures frames at a consistent rate.
Step 9: Optimize GigE machine vision camera parameters
When working with a Gigabit Ethernet camera, such as the MER-131-75Gx, most of the parameters in the frame rate calculator remain consistent with the previous steps. However, GigE cameras employ specific settings to manage bandwidth, utilizing packet size (GevSCPS) and packet delay (GevSCPD) instead of DeviceLinkThroughput.
Let's take a closer look to the frame rate calculator for the example of the MER-131-75Gx camera.
For the most part, the parameters in the frame rate calculator align with those discussed in the previous steps for USB3 cameras. The key distinction lies in the GigE camera's bandwidth control, where you will adjust the packet size (GevSCPS) and packet delay (GevSCPD) settings instead of DeviceLinkThroughput.
By understanding and optimizing these parameters for Gigabit Ethernet vision cameras, you can effectively manage bandwidth usage and ensure optimal performance.
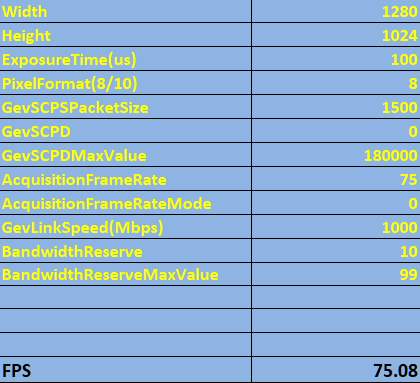
Practical example: using MER-131-75GX camera in the frame rate calculator
Let's explore a practical example using the MER-131-75Gx camera calculator, focusing on achieving optimal performance. This camera model can deliver a maximum frame rate of 75 FPS when utilizing the full 1 Gb bandwidth. However, if you plan to use two identical cameras simultaneously, it becomes essential to limit the frame rate for each camera accordingly. In this case, the maximum FPS per camera would be 75/2, resulting in 37.5 FPS.
To ensure smooth and collision-free data transmission between the cameras, it is crucial to configure the frame rate calculator with appropriate values for GevSCPS and GevSCPD. By adjusting these settings, you can effectively manage the bandwidth allocation for each camera, preventing data collisions and maintaining optimal performance.
Please note that the three fields below are preconfigured with default values and do not require any changes.

This will assure both cameras’ data transmitted will not collide with each other.
The 3 below fields of the frame rate calculator are default value and do not have to be changed.

Need help selecting a suitable machine vision camera or calculating the frame rate? Get in touch!