


10 steps for assembling your industrial camera in the MVEC167 industrial camera enclosure

Welcome to our comprehensive step-by-step guide on how to install your industrial camera into the MVEC167 industrial camera enclosure. For any queries during the process, feel free to contact us.
Let's get started with the installation!
Step 1: Preparations
Begin by unpacking the MVEC167 in a secure location, as it contains essential screws and loose parts. Gather the following items: a Torx T10 screwdriver, your industrial camera, lens, and cables.
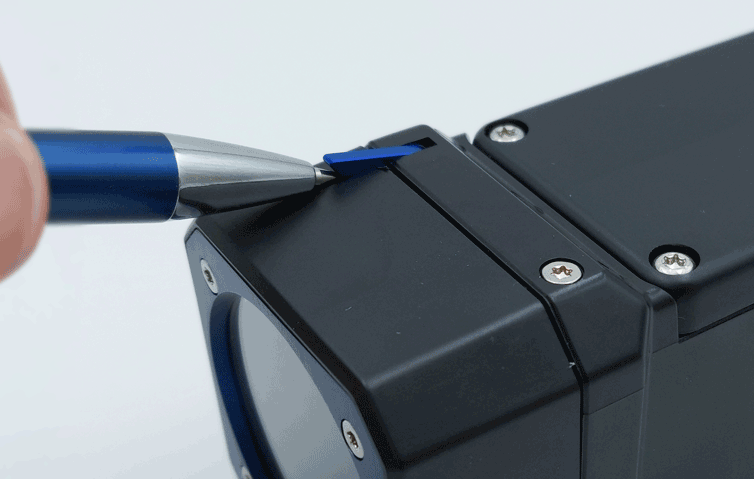
Step 2: Remove the lens tube
To remove the lens tube, lift the blue pin located at the top of the enclosure. You can easily unlock the pin using a pen. With the pin up, twist the lens cap to the right to detach it. Store the lens cap in a safe place.
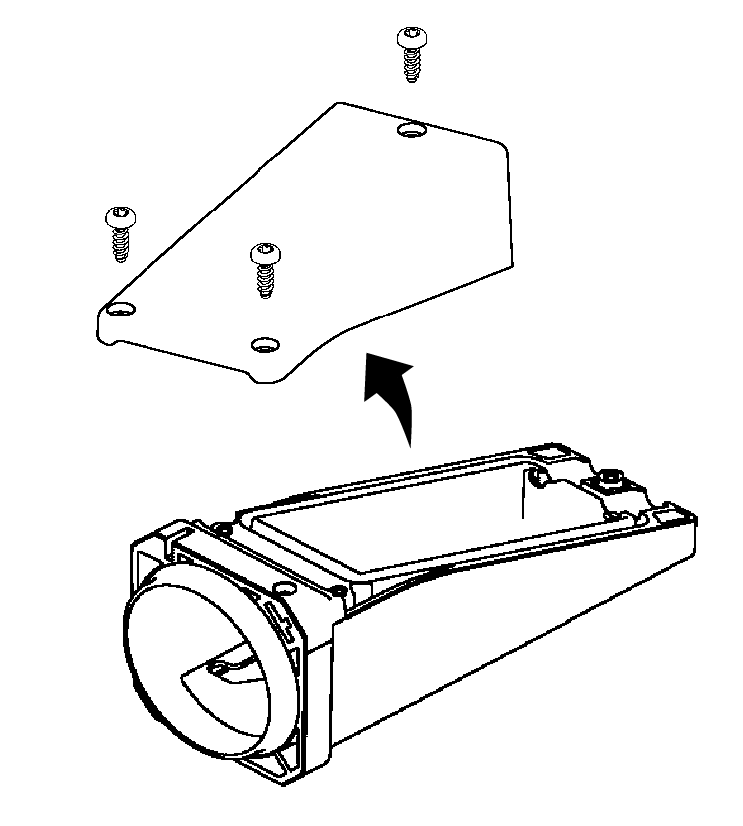
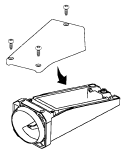
Step 3: Open the top side
Use the Torx T10 screwdriver to release the three screws positioned on the top of the enclosure. Place the screws and the top side in a secure location. During this process, be cautious as the I/O plug might come loose. Ensure that you don't lose this small component.
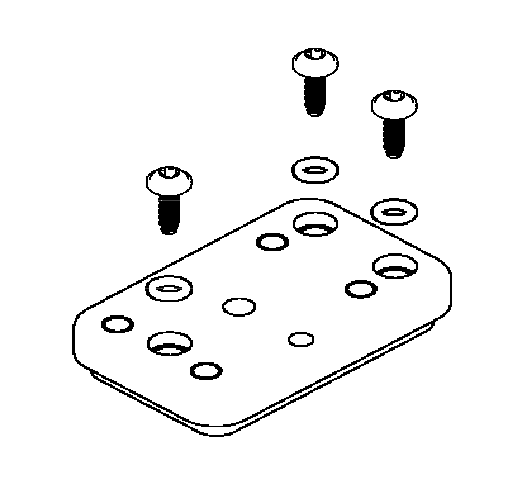
Step 4: Remove the tripod mounting plate
Utilize the Torx T10 screwdriver to unscrew the three screws from the blue tripod mounting plate. Confirm that each screw has a rubber ring. Store these parts safely for future use.
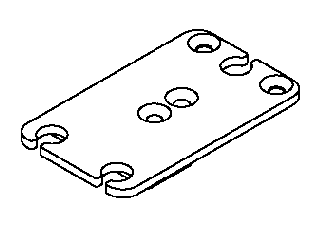
Step 5: Choose the adapter plate for your camera brand and attach the camera to the enclosure
The enclosure provides three different adapter plates. Select the one that suits your camera brand. Insert your camera into the enclosure through the lens opening. Position the chosen adapter plate through the bottom opening and use screws to secure the camera and plate to the enclosure.
Step 6: Reattach the blue mounting plate
Before reattaching the mounting plate, ensure that the rubber rings are in place over the screws, and the rubber O-ring seal is wrapped around the mounting plate. Be cautious not to apply excessive force on the screws, as this can damage the screw threads.
Step 7: Connect the cable(s)
Connect the USB3 or GigE cable to the camera and guide it through the left cable groove. If you intend to use an I/O cable, connect it and route it through the right cable groove. If not using an I/O cable, seal the hole with the I/O plug. For USB3 cables, make sure there is a blue rubber sleeve attached to enhance hole sealing.
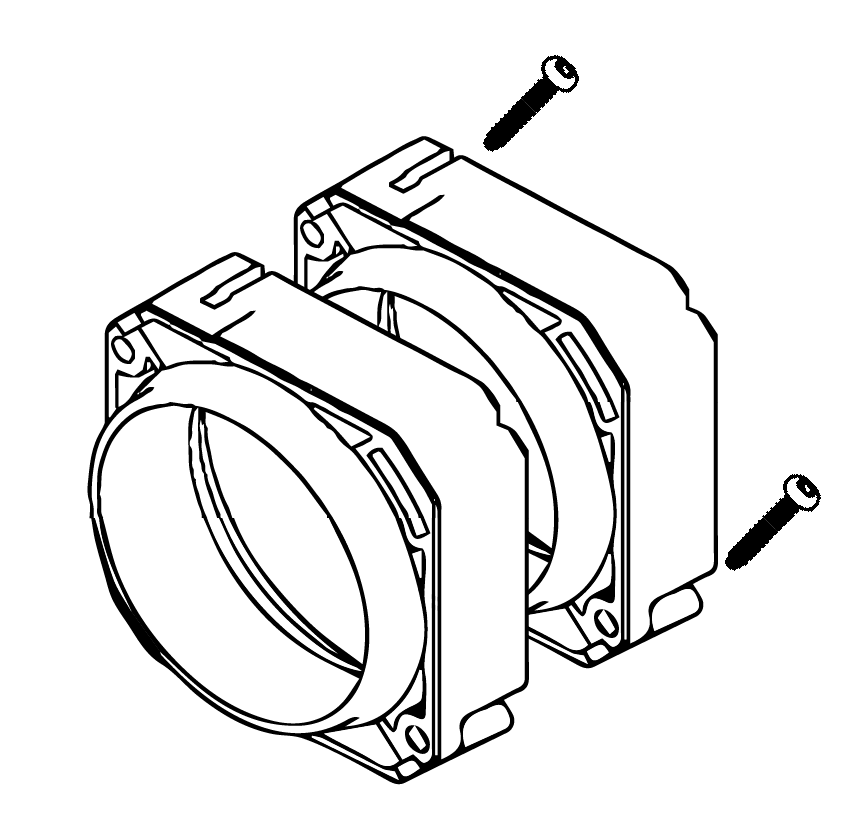
Step 8: Assemble the topside
Carefully screw the top side back onto the enclosure, ensuring the cables are placed neatly in the cable grooves. Avoid applying excessive force on the screws to prevent damage to the screw threads.
Step 9: Install the lens
Attach the lens to the camera by securely screwing it. Note that lenses with a diameter exceeding 40mm will not fit the housing. After installing the lens, check if the lens cap is long enough to be attached to the enclosure.
If the lens cap falls short, attach a lens tube ring to the lens cap. Remember to use rubber O-rings on each lens tube you connect. Align the notch on the lens ring with the groove on the lens cap. Be cautious when using Torx screws to avoid damaging the screw threads.
When the lens tube is of sufficient length, attach it to the enclosure. Place the black handles of the enclosure in the corners of the lens tube and twist the lens tube until it clicks. Then, secure the blue pin back in place.
Step 10: double check the installation
Take a moment to review each step of the enclosure installation and ensure everything is sealed correctly. If you haven't used an I/O cable, verify that the I/O plug has securely sealed the hole.
Congratulations! You have successfully installed your industrial camera into the MVEC167 industrial camera enclosure. We wish you the best with your new setup. If you encounter any issues, feel free to reach out to our customer support team for assistance.