5 steps for acquiring images by using the Python sample with Python script using PyCharm

Python is a programming language that can be used for creating machine vision programs. This article guides you through downloading, installing, and using a Python sample to acquire images using the program PyCharm. Read through the following simple steps to get started or ask us your questions below.
Step 1: Download and install required software
To get started, download and install our Windows SDK to acquire images from the machine vision camera. Follow the instructions provided in this guide to make sure you have the SDK installed
Once the Daheng SDK is installed, you can find several samples in the directory C:\Program Files\Daheng Imaging\GalaxySDK\Samples\Python SDK
Step 2: Download Python 3.8 executable installer and install it
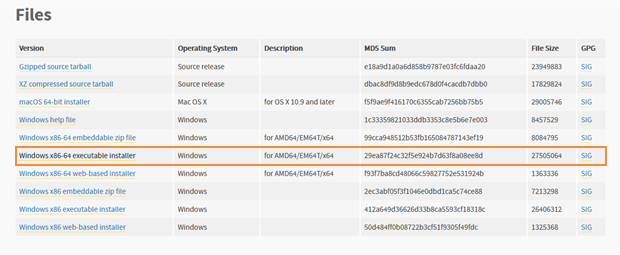
Next, download the Python 3.8 executable installer from https://www.python.org/downloads/release/python-380/ and select the “Windows x86-64 executable installer” option.
Double-click the downloaded file to open it and ensure that the “Install launcher for all users (recommended)” and “Add Python 3.8 to PATH” options are selected.
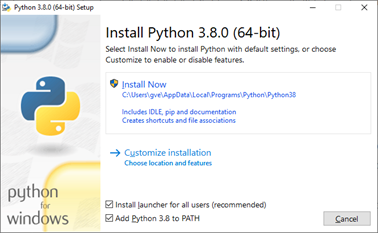
Click “Install NOW” and wait for the installation process to complete.
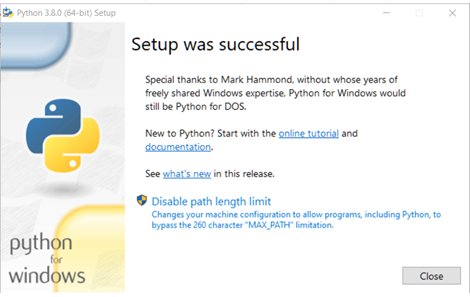
Close the next window, Python is now installed.
Step 3: Install PyCharm, the program to run Python scripts
Download and install PyCharm, the program used to run Python scripts. Make sure to download the community (free) edition of PyCharm from https://www.jetbrains.com/pycharm/download/#section=windows.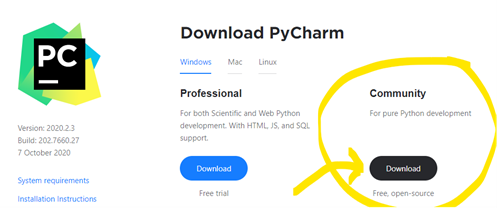
Once downloaded, double-click on the file to run the installer.
Follow the prompts to install PyCharm.
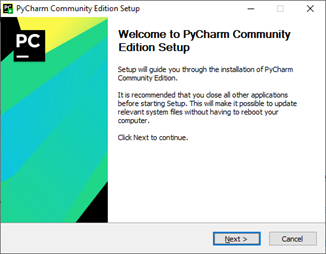
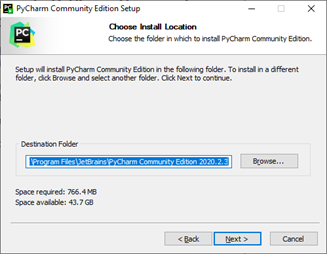
Ensure that the options “64-bit launcher,” “Add launchers dir to the PATH,” and “.py” are selected.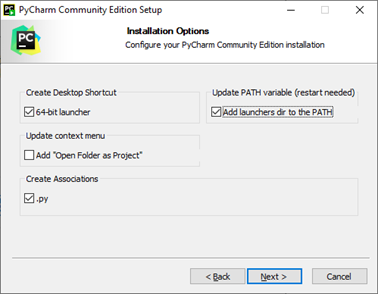
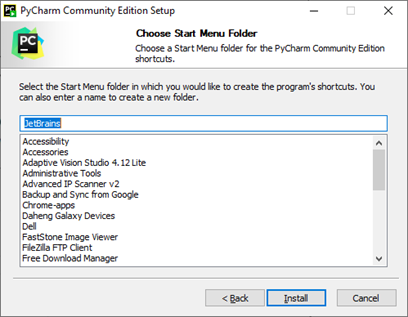
Click on Install. Once installation is complete, reboot the PC.
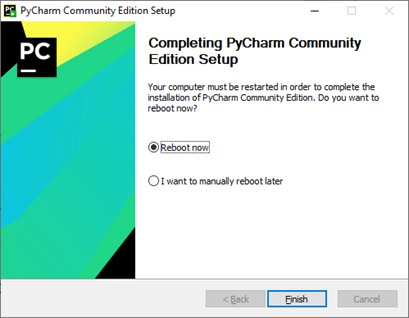
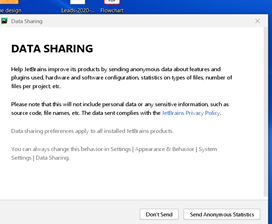
After reboot, open PyCharm. Agree to the Privacy Policy and click continue.

You can choose now whether you do or do not want to send Statistics.
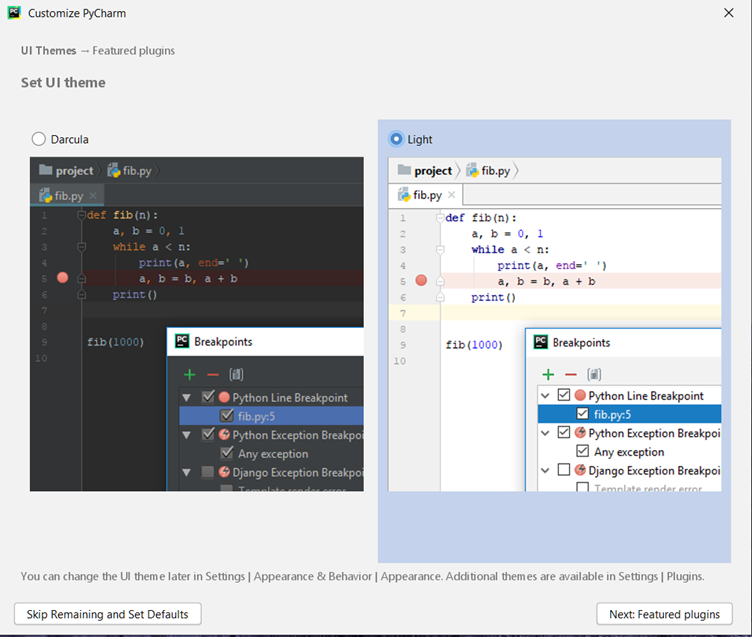
You will be shown the customization page, you can choose the theme for PyCharm, or click on “Skip remaining and set Defaults”.
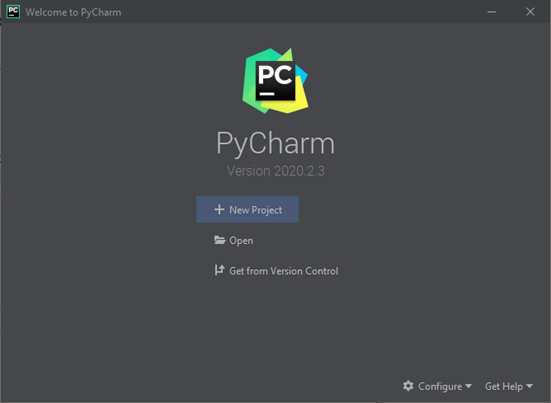
Step 4: Run the Python script sample with PyCharm
Now that PyCharm is installed, you can run the Python script sample. Click on the button + New Project button and ensure that all the options are selected.
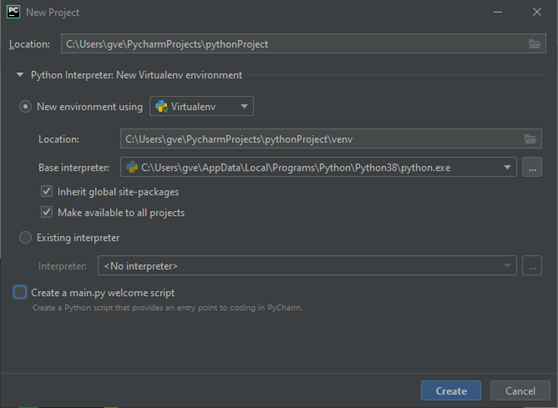
Wait for the program to finish “Creating Virtual Environment”
In the top toolbar go to file > settings and expand the menu for Project 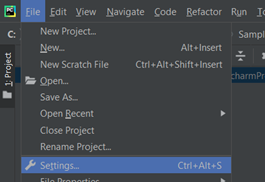
In the top toolbar go to file > settings and expand the menu for Project: python Project. 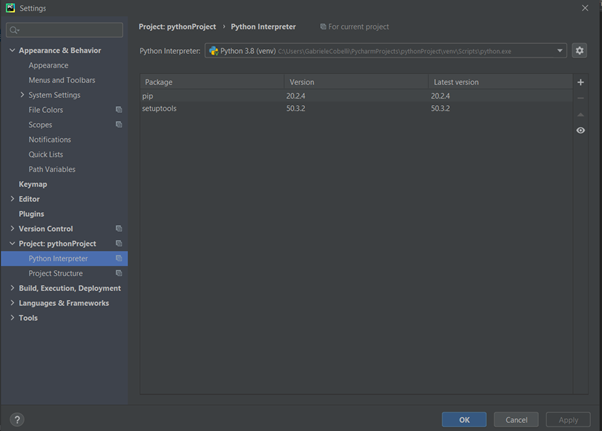
Click on the + sign on the right side of the page.
Add the following modules by searching them by name, selecting them one by one and clicking “install package”:
- Numpy
- Pillow
- opencv-python
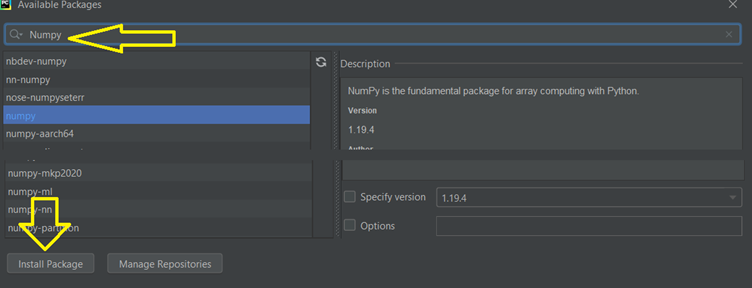
Here you can see all packages installed.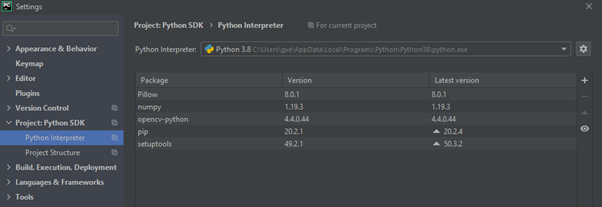
When done close the interpreter packages window, click ok.
Step 5: Start running the Python Sample
Next, go to File > Open and select C:\Program Files\Daheng Imaging\GalaxySDK\Samples\Python SDK\GxSingleCamColor.py. Click OK and execute the script by selecting Run > GxSingleCamColor.py from the Menu toolbar.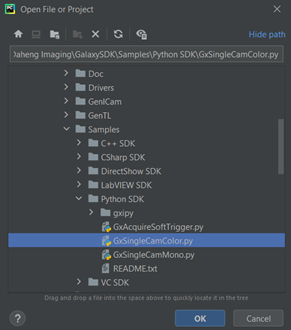
Click OK and execute the script by selecting Run > GxSingleCamColor.py from the Menu toolbar.
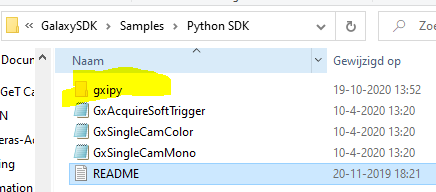
*Please note that GXIPY folder should be on the location of the scripts
The Python script sample will run, showing the result of the operation within PyCharm. Any errors or warnings will also be displayed.
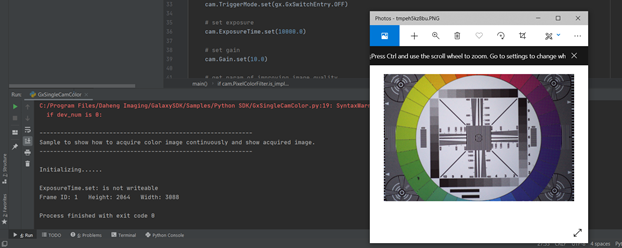
If you have followed these steps you are now able to acquire images by running python scripts in PyCharm.
If you have any questions about downloading, installing and running Python and PyCharm, make sure to contact our Technical Support division. They are always happy to help you out.


